
Last modified October 15, 2018
By Butch Bridges
Lone Grove, Oklahoma
Around the first part of March 2009 I came up with the idea of building a garden/tool shed out of wood pallets. I was needing a good shed for various things every since we moved here, and I thought the wood pallets just might fill the bill. And recycle pallets that would have been headed for the dump!
My first task was to find suitable wood pallets. Pallets come in all sizes. I just happened to find a place in Ardmore where nearly all the pallets they put out back by the dumpster were exactly 42 inches square. And each pallet just happened to be in nearly new condition! I wouldn’t realize until later how important it would be to use square pallets. By using 42″ X 42″ square pallets meant no modifying. The less cutting you have to do to the pallets, the better, because they are made of extremely hard wood. Ideally 36″ square pallets should be used, but I didn’t know where a good source for that size was available.
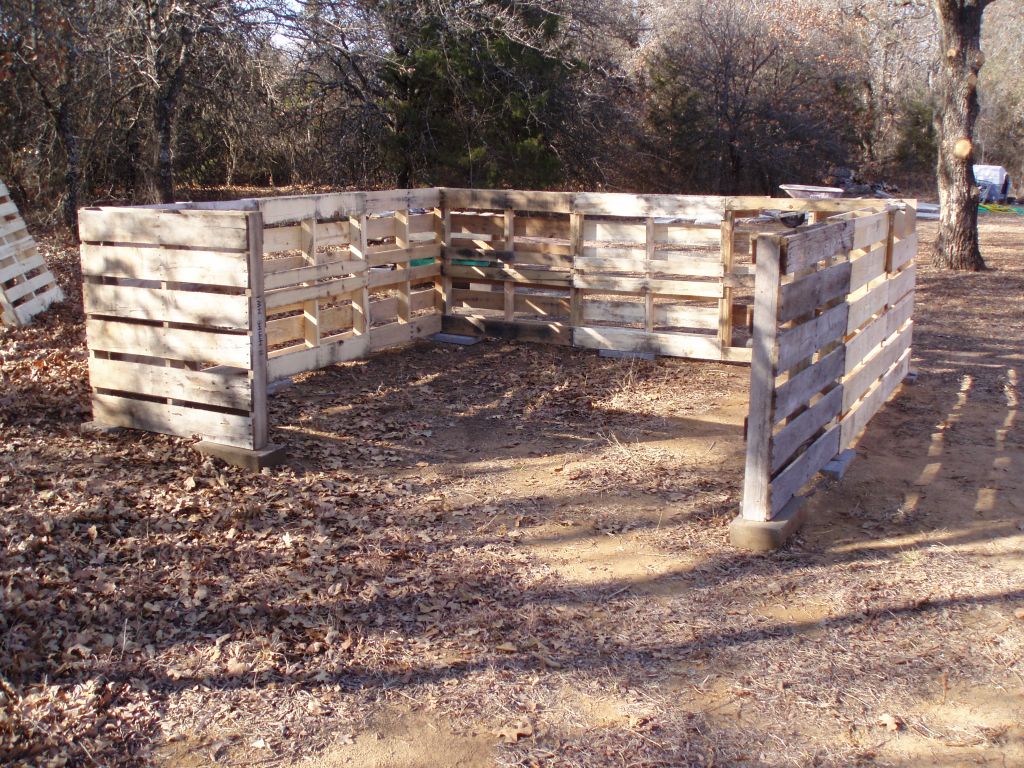
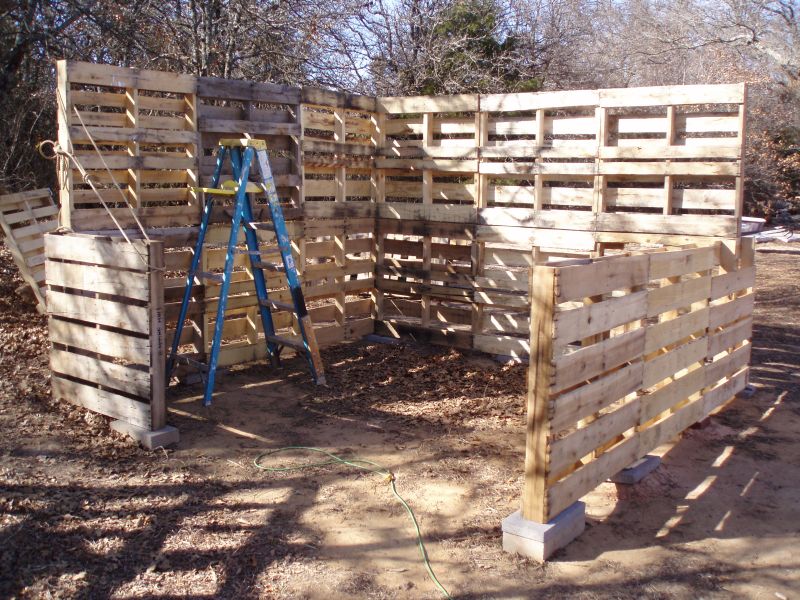
To make one wall, I bolted 3 pallets together, end to end (42″ X 126″ inch wall, about 10½ feet).
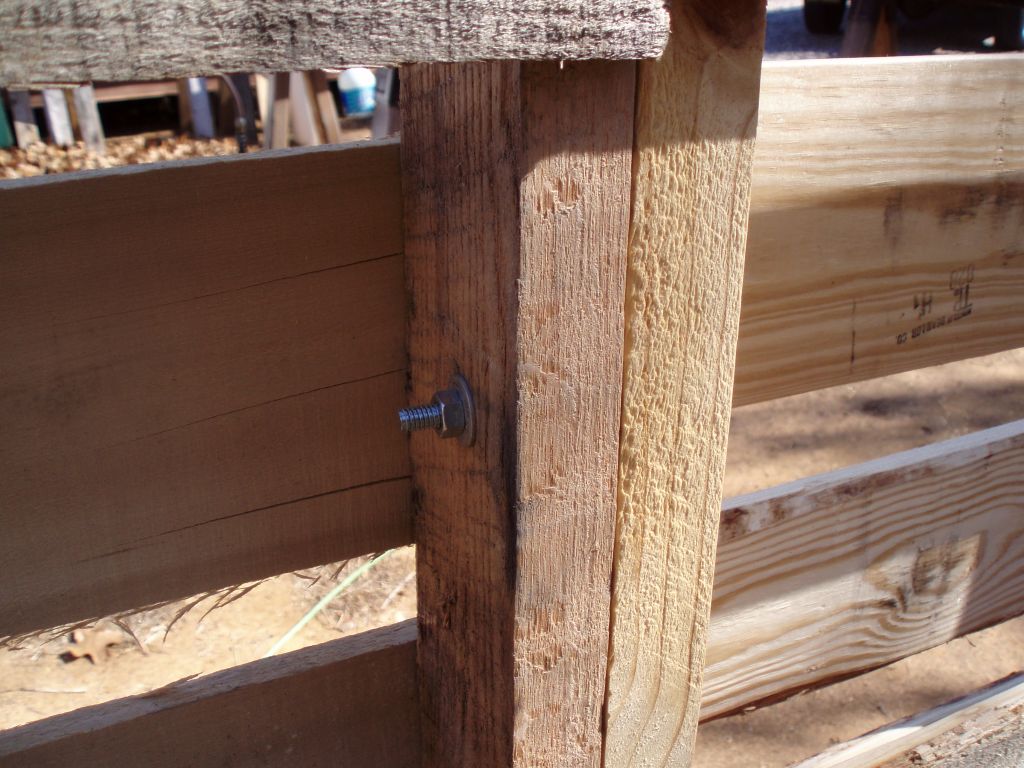
To put together all the walls I used about 50 3½ inch long, 5/16 inch bolts along with washers. If I had it to do over again, I might have used ¼ inch bolts and saved a little dough.
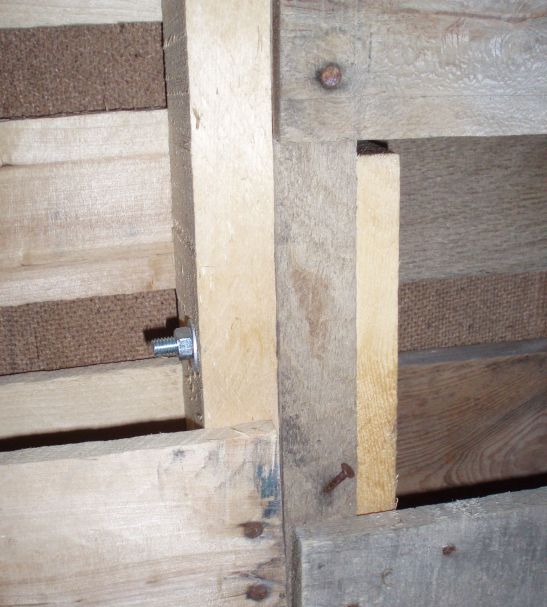
A couple of people has asked how it connected the corners. I still used bolts and since I didn’t have a short bolt, I used a spacer board to make up the difference. Corner Bolt
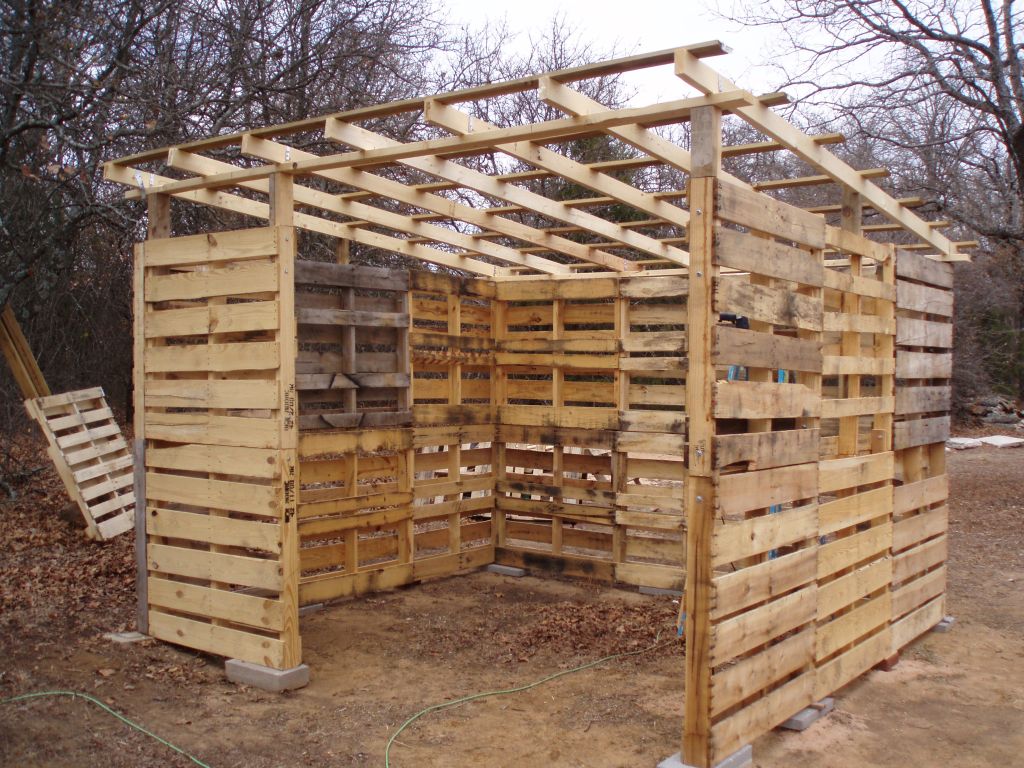
To start the second level wall, I bolted 2 sections together, then placed them on top of the first wall, beginning at a corner. I continued bolting one section to the next, until I had gone all around the shed’s 2nd level. To secure the 2nd level to the 1st level, I used a couple of short pieces of 1X4’s inside of the walls of the pallets with bolts (about 24 bolts) all the way through. It took 4 inch long bolts for this.
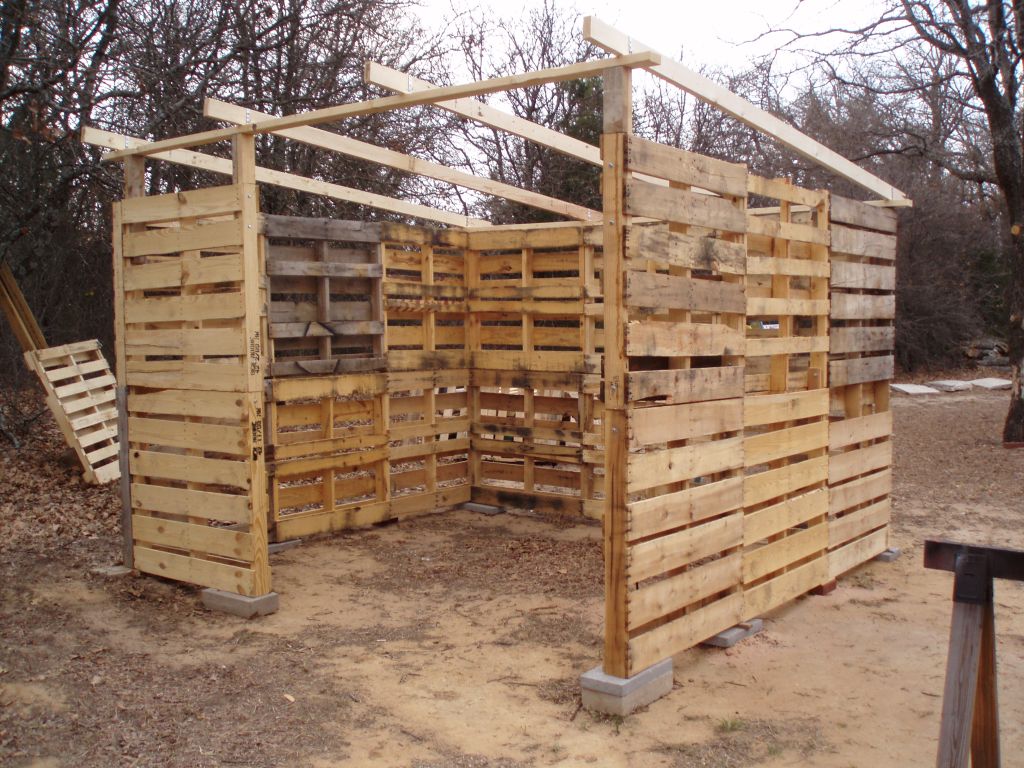
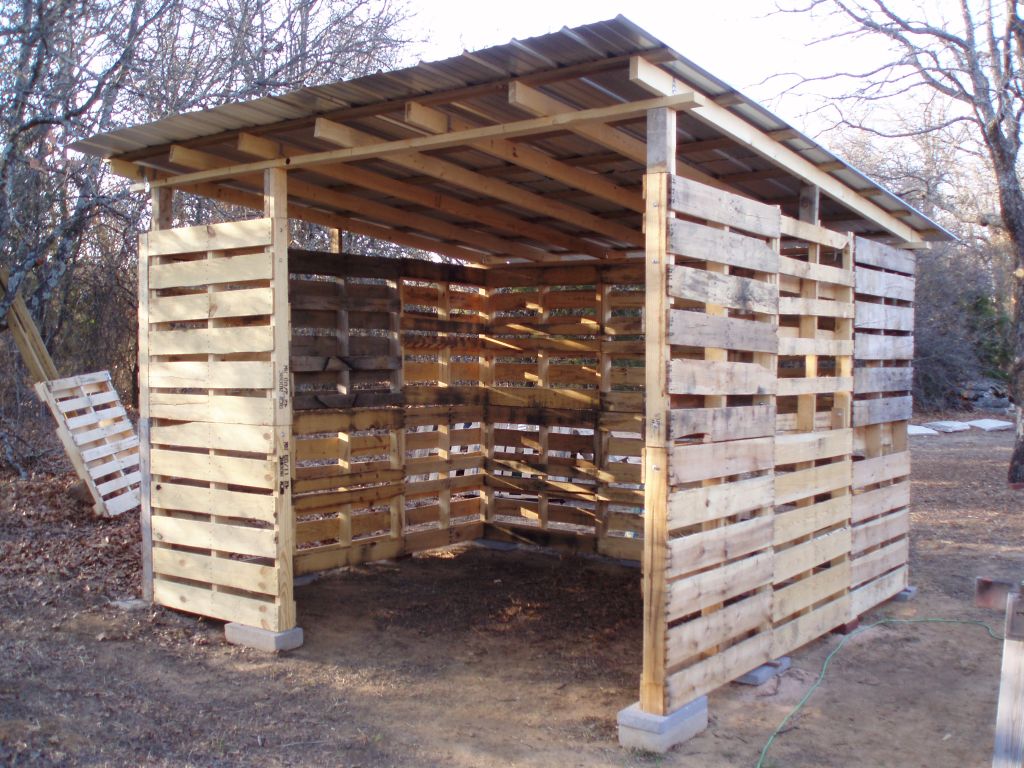
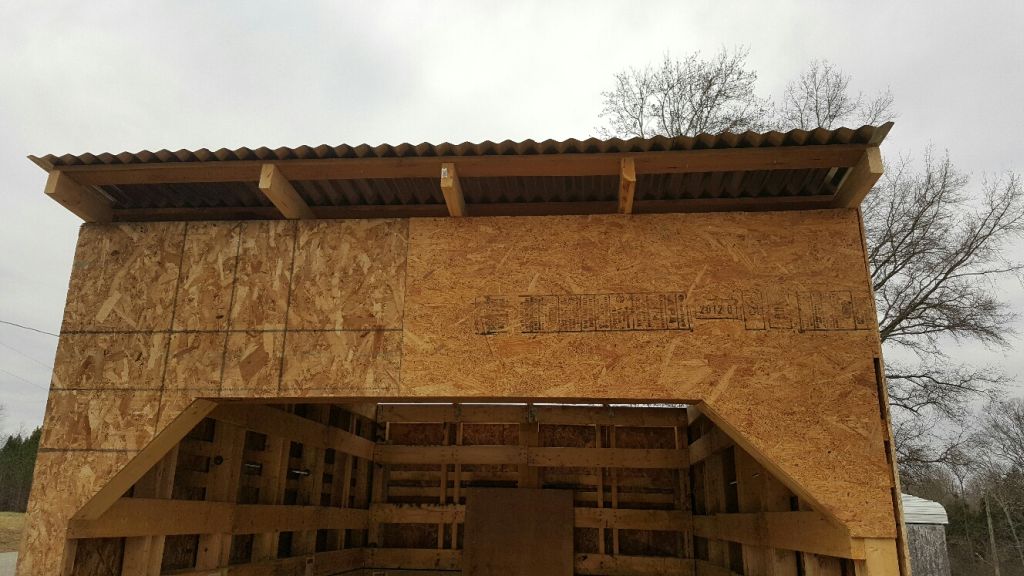
For the roof I used 2X4s (12 feet long) turned on their sides (2X6s would be better, but cost more). I raised the front of the shed’s roof by another 10 inches using 2X4s as extensions. This would give the roof the slope I think it needed. Across the 2X4s I placed 1X4s (12 feet long) secured with 3½ deck screws (63 of them since I put 2 at the ends of each 2X4). For the roofing material I selected galvanized carport type sheet metal from Builder Bob’s in Ardmore.
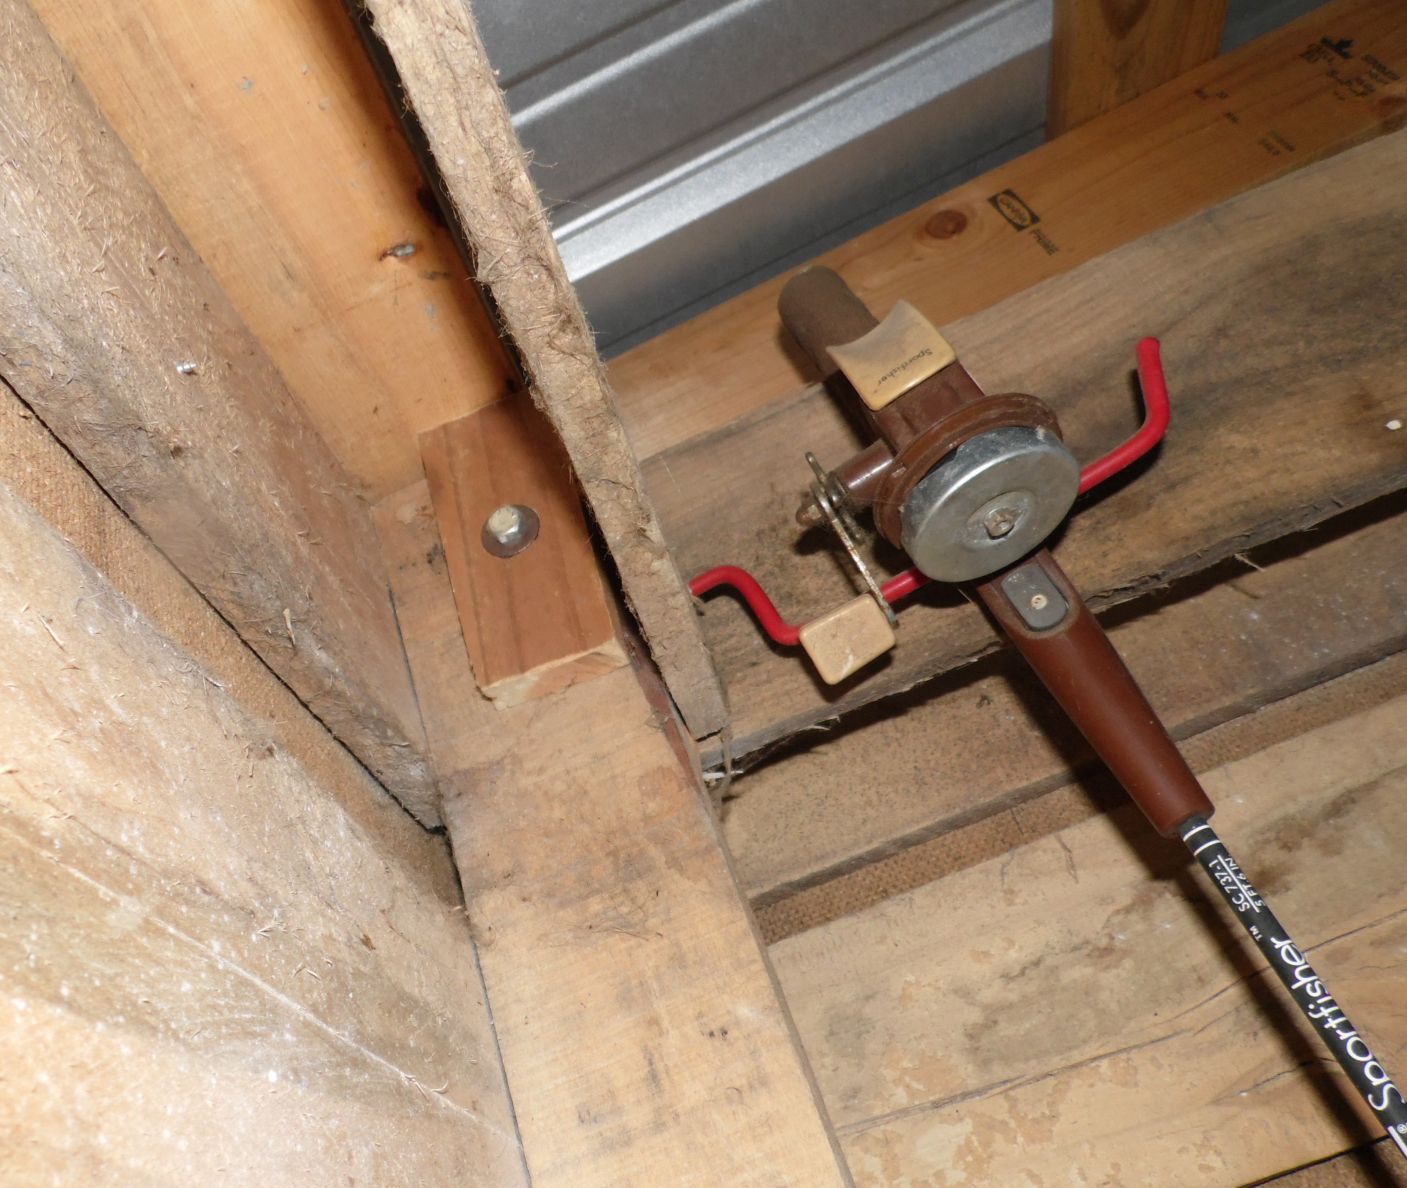
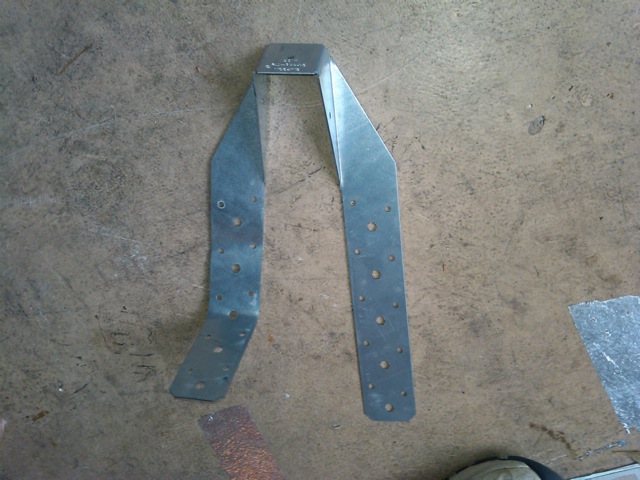
To connect/hold the roof to the walls I used Hurricane Straps. Click Here
Jill even took a picture of me putting the sheet metal on top.
Photo 5 Photo 6 Photo 7 Photo 8
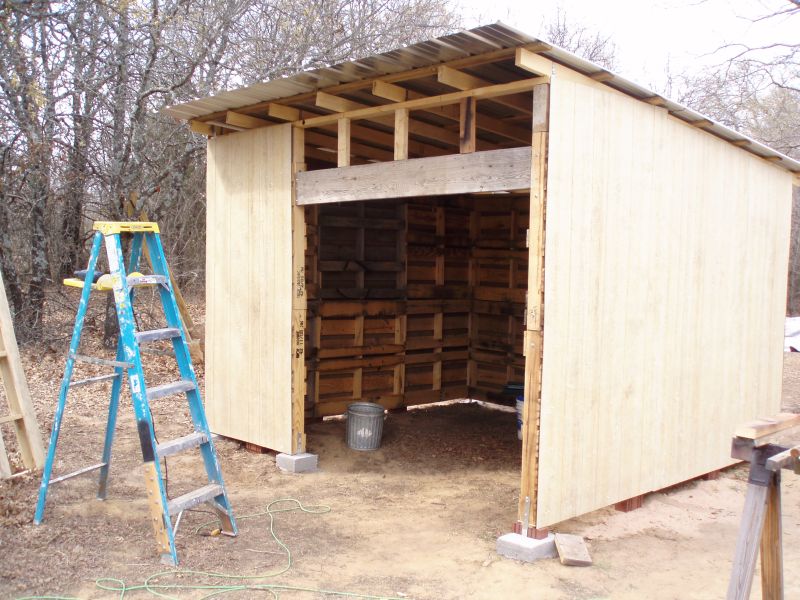
For the exterior walls I chose 4X8 sheets of 7/16 inch thick ‘Knotty Pine BarnSide’ which is only available from Lowe’s as far as I know ($16.95 a sheet – took 10 sheets).
( BarnSide is now called LP SmartSide Panel.) Link to LP SmartSide
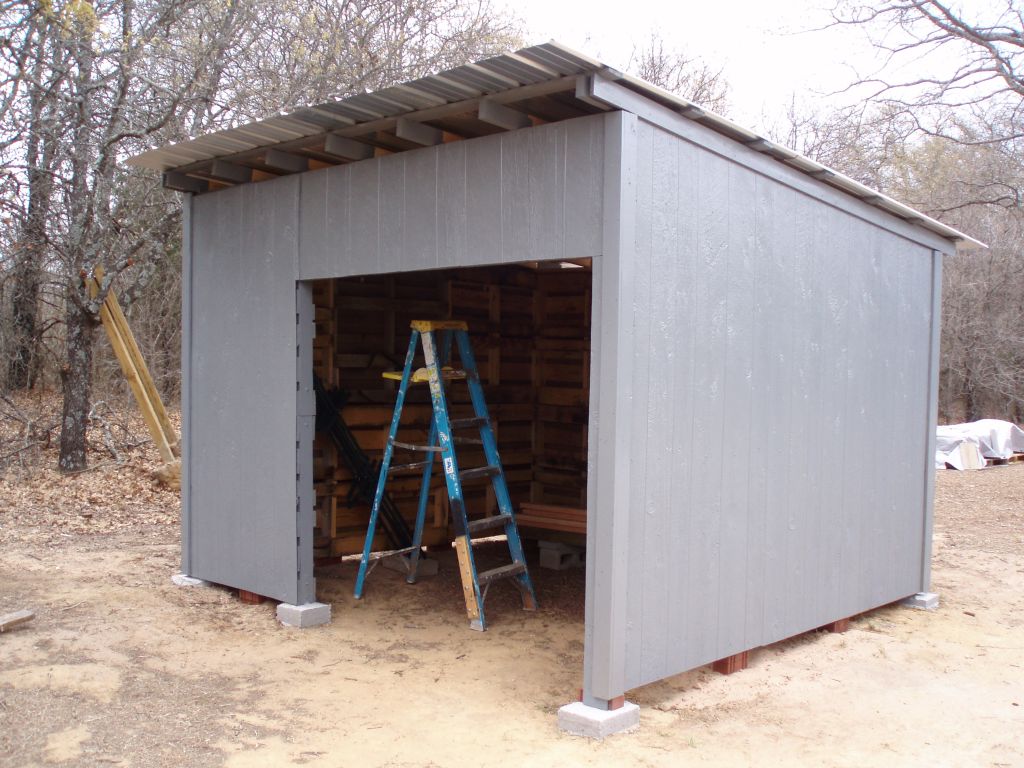
To the siding I applied a good coat of Battleship Gray oil based paint (not water based Latex). You can get a quality oil based paint at Cook Paints in downtown Ardmore at Main Street and Washington.
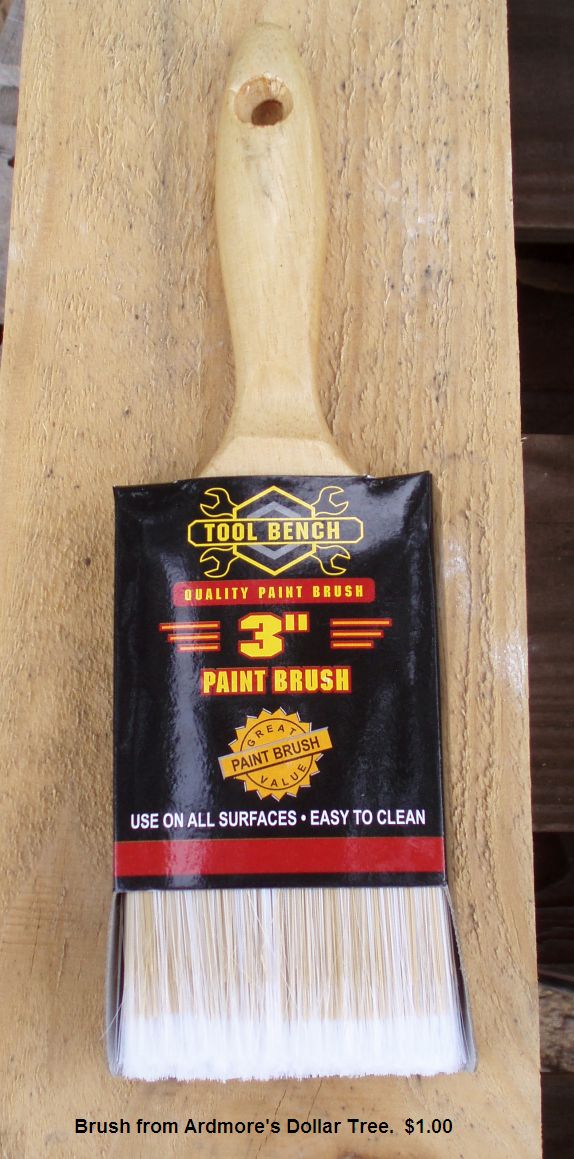
Paint brush tip: Jill’s keeps a supply of those $1 brushes (there is about 3 sizes) from Dollar Tree on hand all the time. I have used one brush on the first day, wrapped it tightly in a plastic bag, used it the second day, wrapped it again real tight in another plastic bag, and then used it again on the 3rd day (using oil base paint). Now that’s getting mileage out of a $1 brush. I’m sure the same kind of brush can be bought at General Dollar or Family Dollar stores.
This is a pic of my shed doors which I already had made from a previous shed and just had to modify a little to make them work on the new shed. This first pic is before the doors are painted.
I probably should have done the next step first, but didn’t. I secured the shed to the ground with some concrete piers I poured at each corner, along with a heavy steel strap imbedded into the concrete along with an 18 inch piece of rebar I drove down into the hole. I should have dug the holes deeper for the concrete, but after months and months of hardly no rain, the ground was so hard, it was the best I could do. Between the corners I used just plain old red bricks under the walls for support.
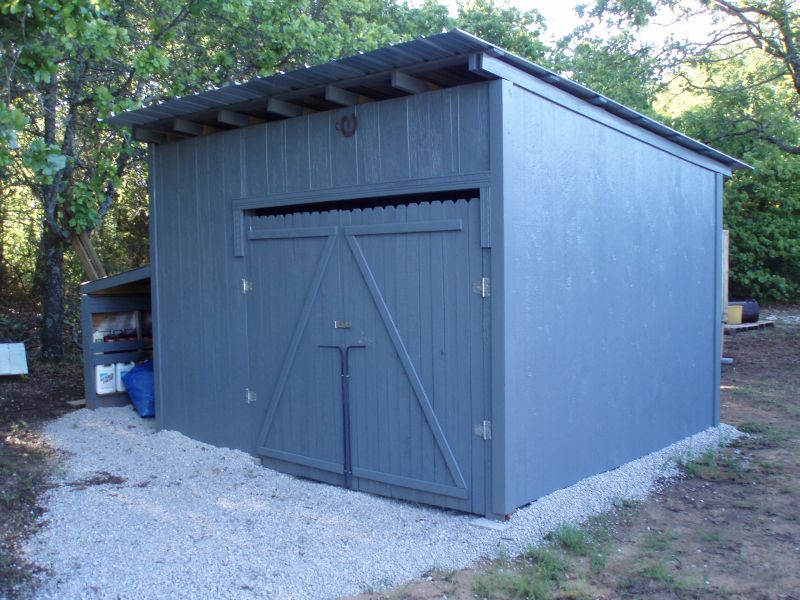
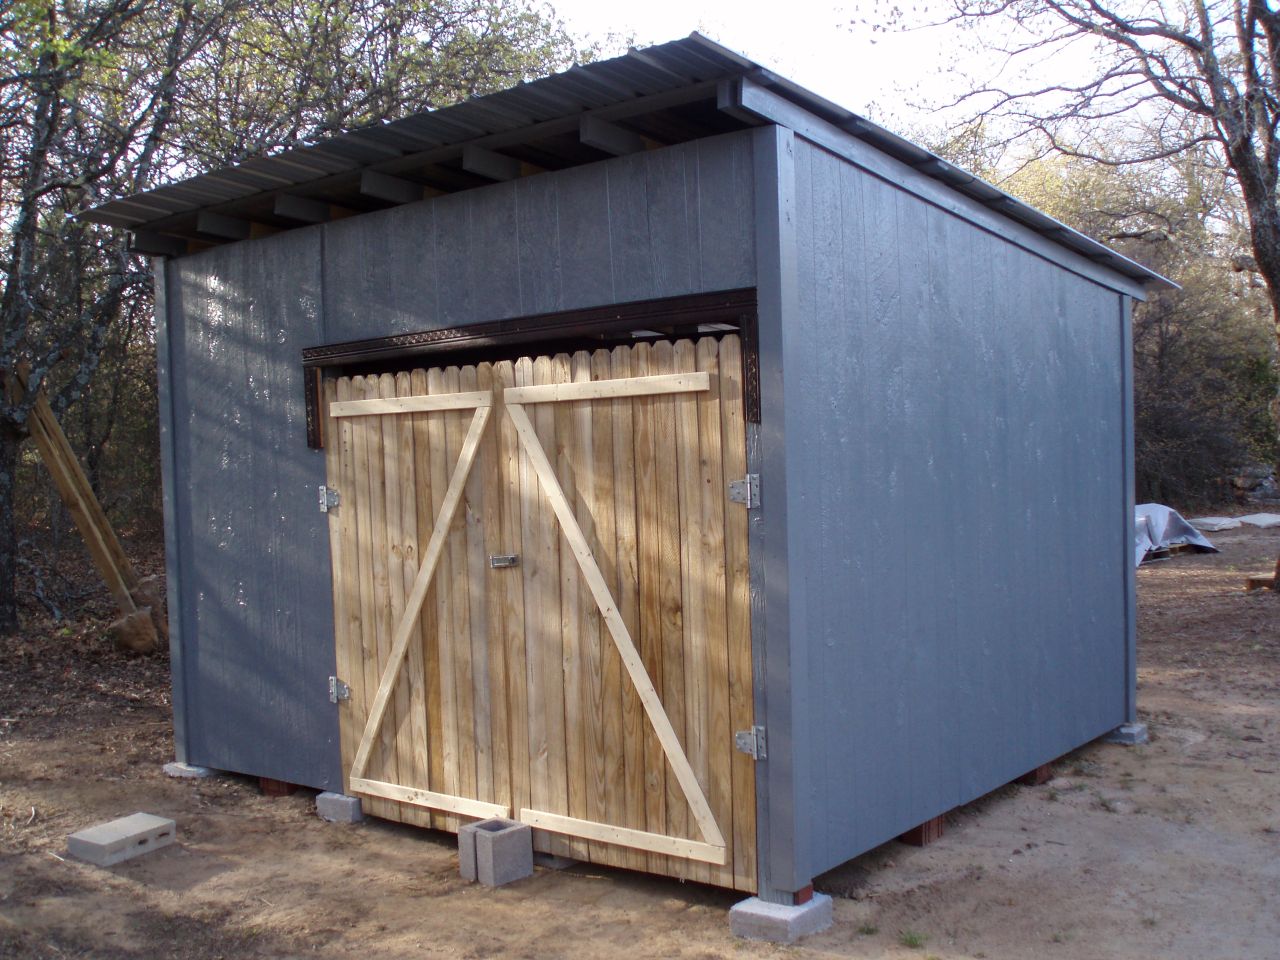
And there is the final product- painted, gated and ready.
In summary, my 10 ft X 10 ft shed made from recycled wood pallets turned out very well. Stronger than I ever expected, less complicated to make, and saved me money over the conventional building method or store bought sheds. Since there is no plastic in the construction, it should last many years. Total cost was less than $500.
UPDATE: We decided on Saturday April 11, 2009 to add a smaller storage shed off the side of the main shed using 4 pallets and a 2X4 frame, fold-up roof attached with 4 hinges.
With the pallet shed finished, I’ve started a chicken coop made of wood pallets. We plan to have about 4 hens and a rooster. Just click here for more info….. Chicken Coop!
NOTE: The heat treated pallets are the most safe, no chemicals, no bugs, safe to handle. They are labeled or branded HT. Also show place of origin. This is important near animals or food, better for the environment.
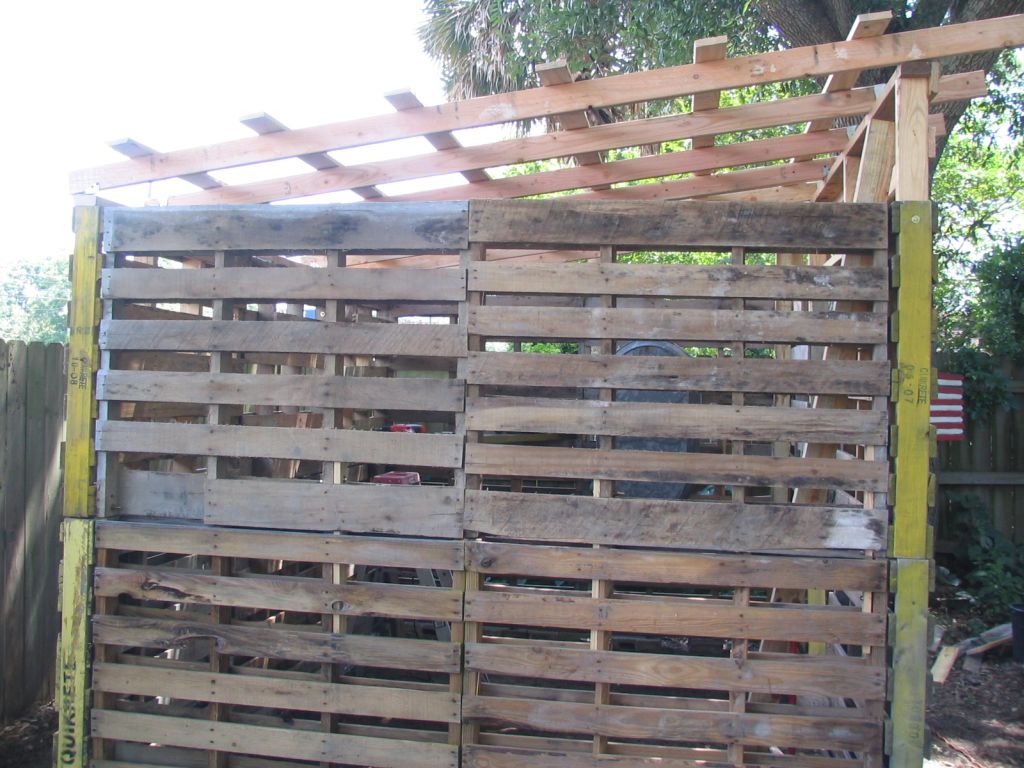
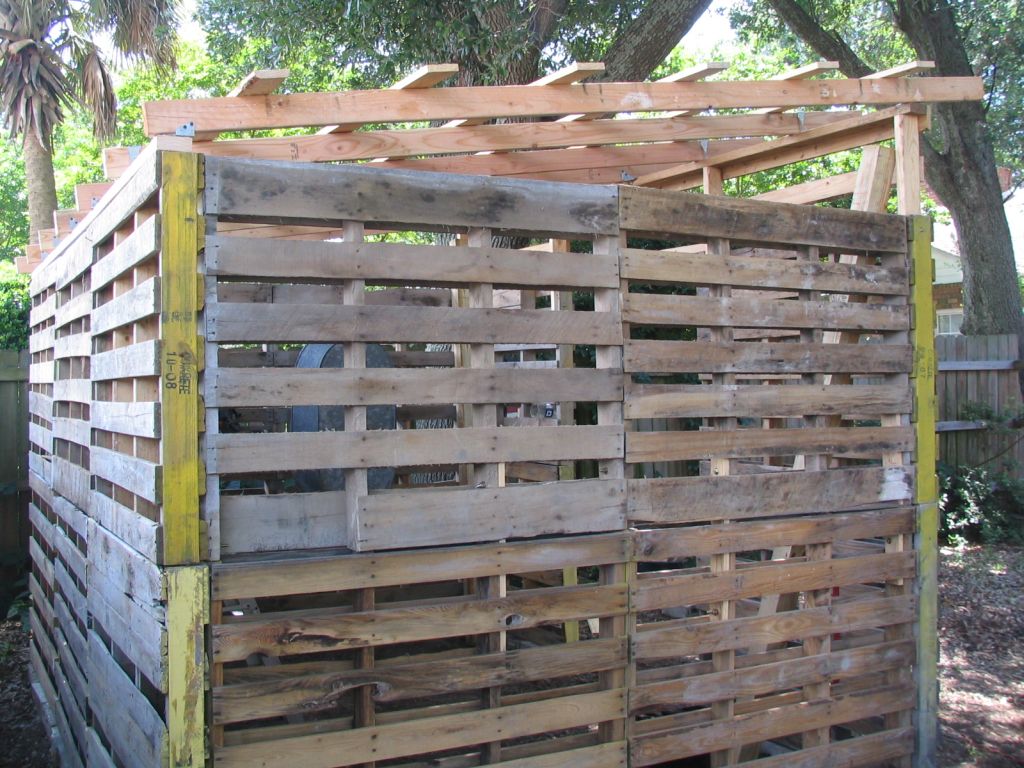
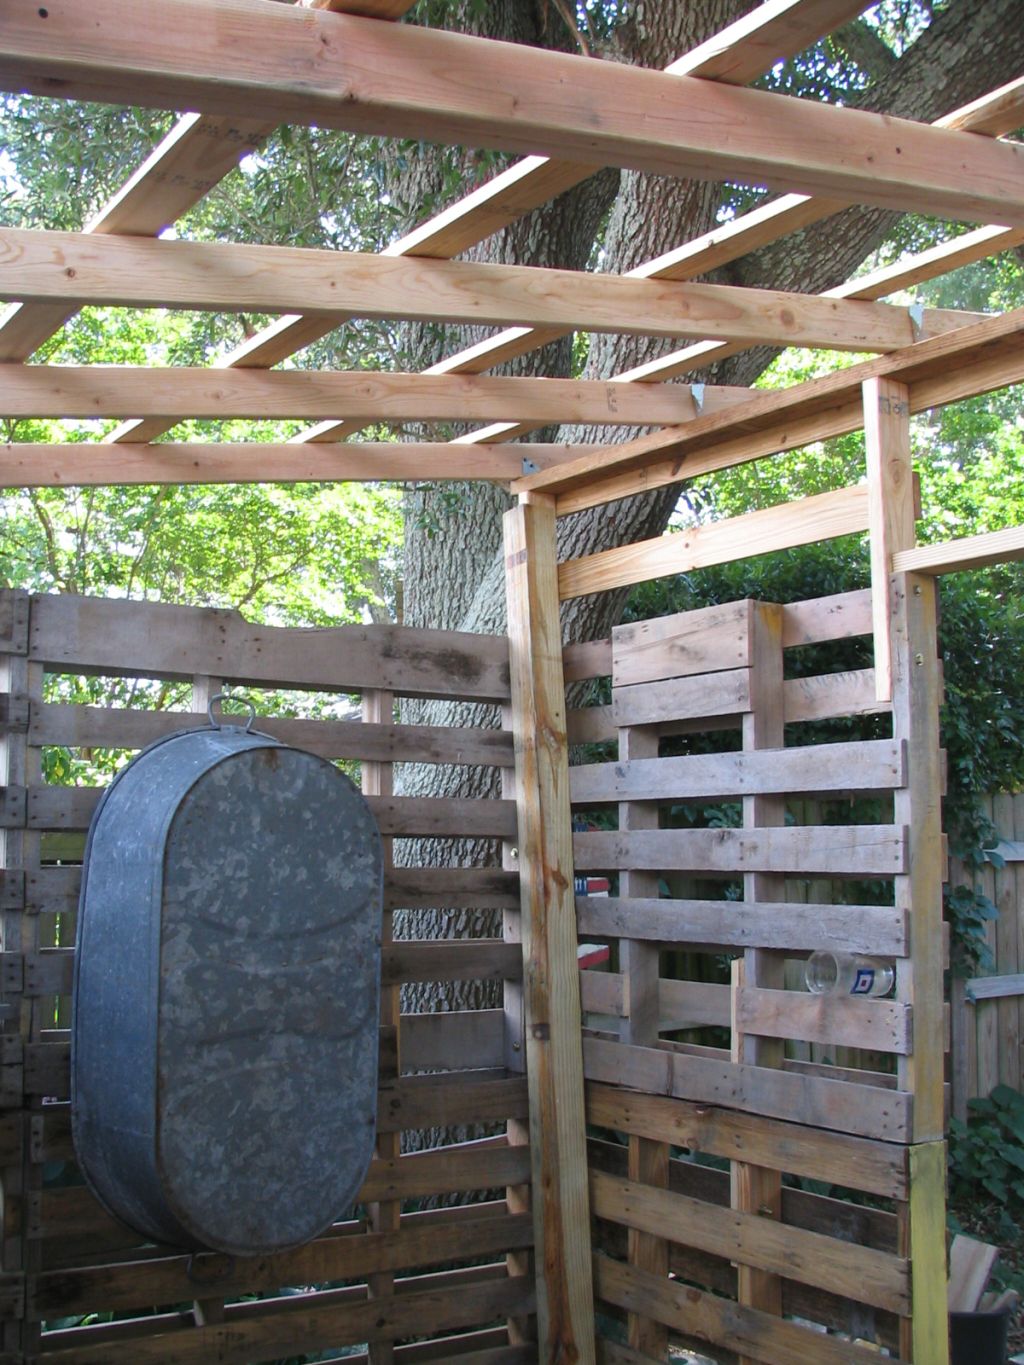
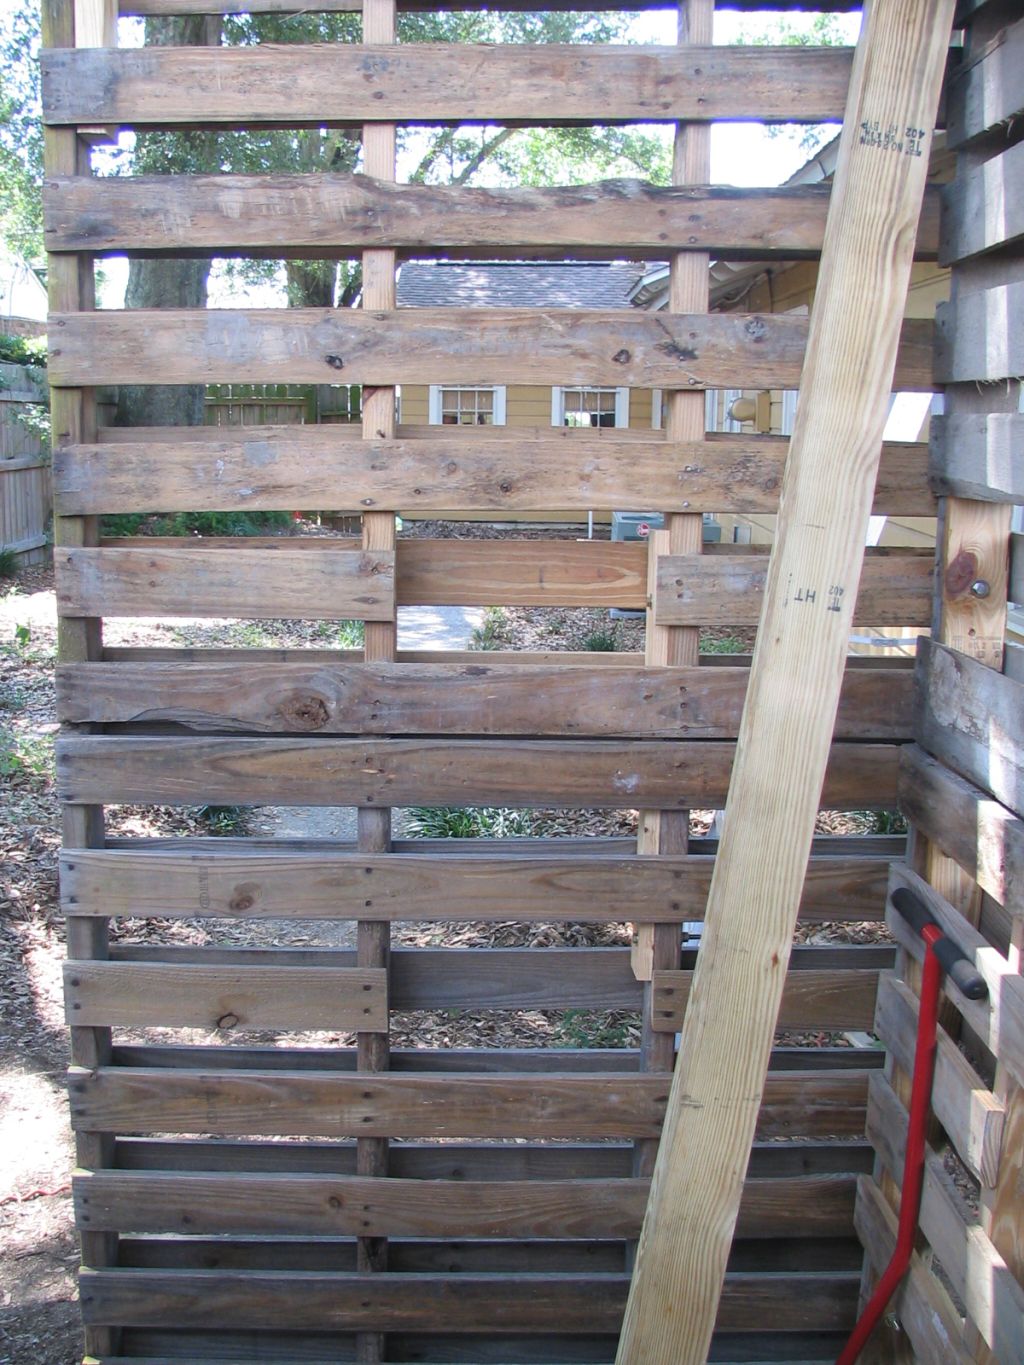
A man in Florida decided to try his luck making one in his backyard. He incorporated some new ideas of his own, resulting in a really nice shed made from recycled pallets.
View 1 View 2 View 3 View 4 View 5 View 6
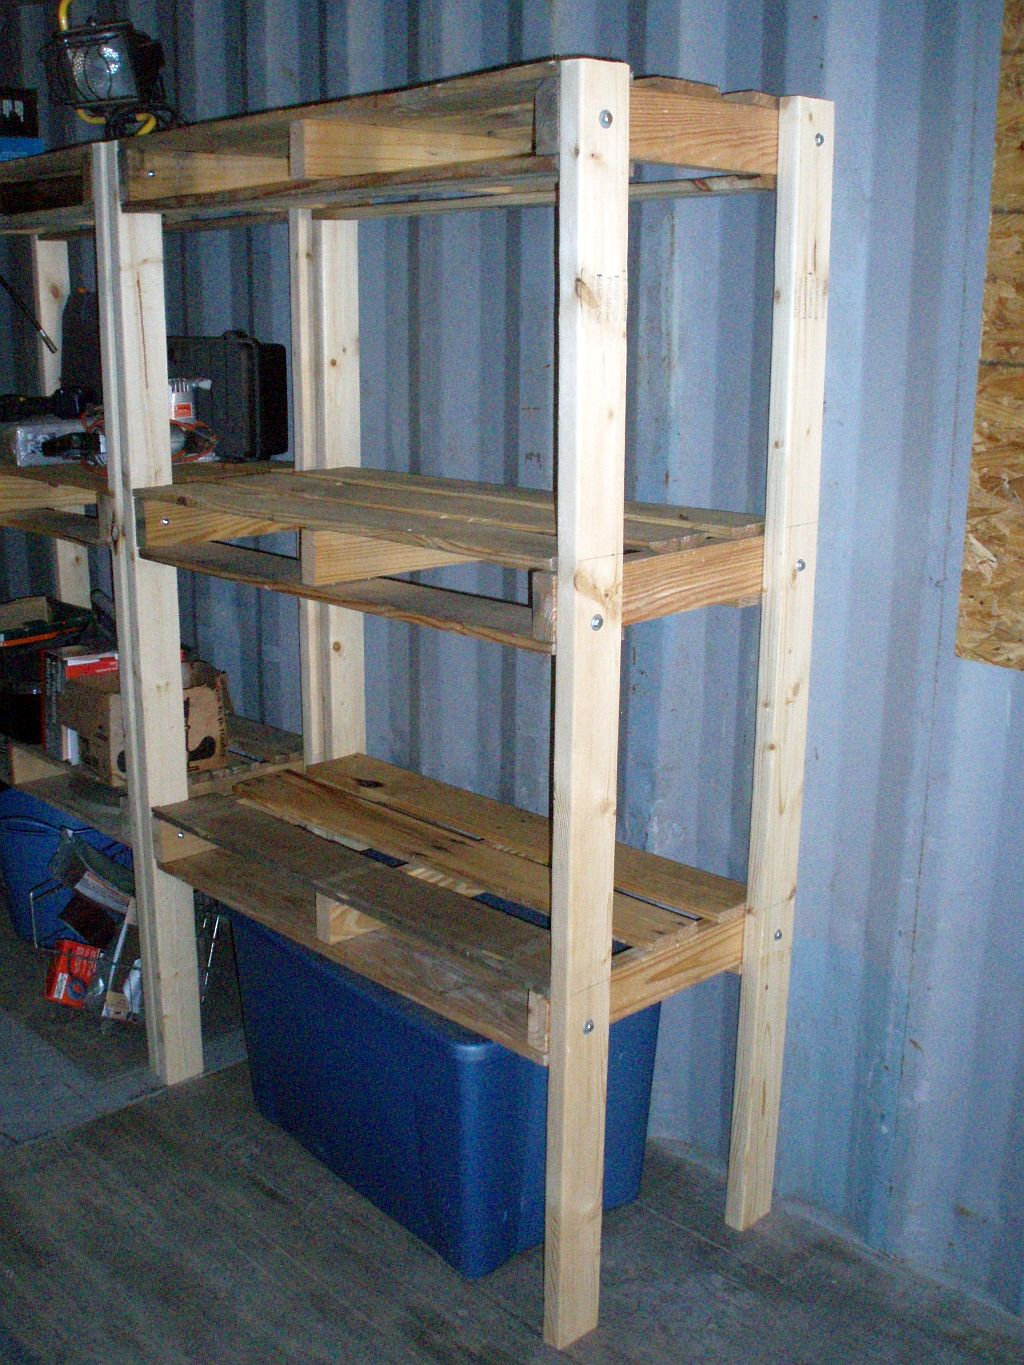
07/12/09 I needed several shelves to go in our 40′ cargo building, so I decided to try my luck making shelves out of wood pallets. I have less than $14 in each 42″ wide X 21″ deep X 6 ft tall shelf. I made 9 units and they turned out very strong, should last many years. Click here….. Pallet Shelf
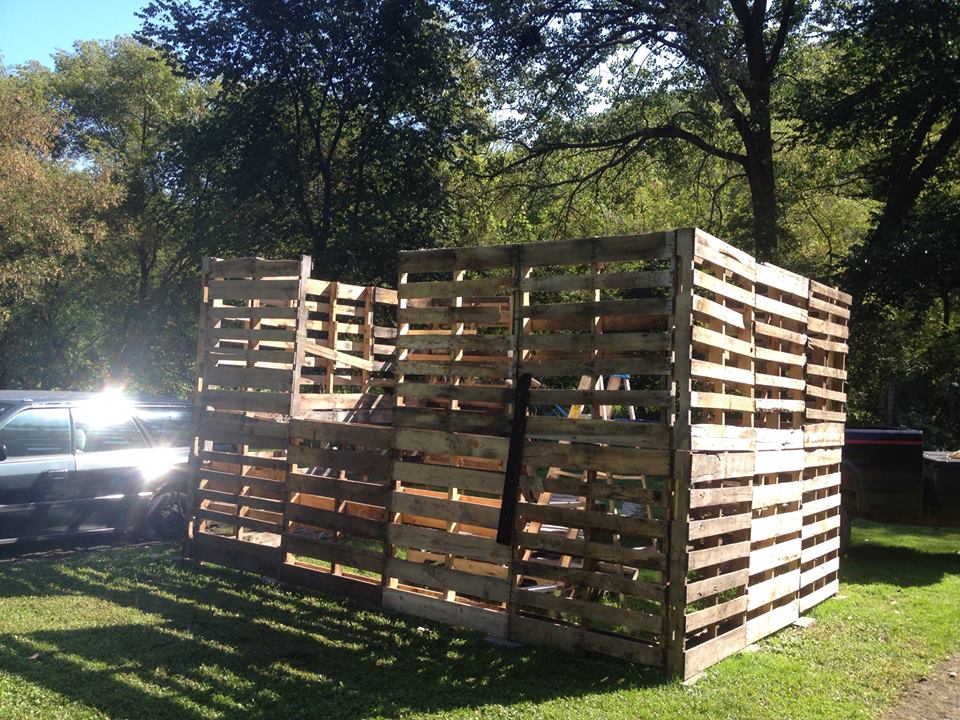
10/23/14 Tom in Minnesota built a shed from pallets
Photo 1 Photo 2 Photo 3 Photo 4
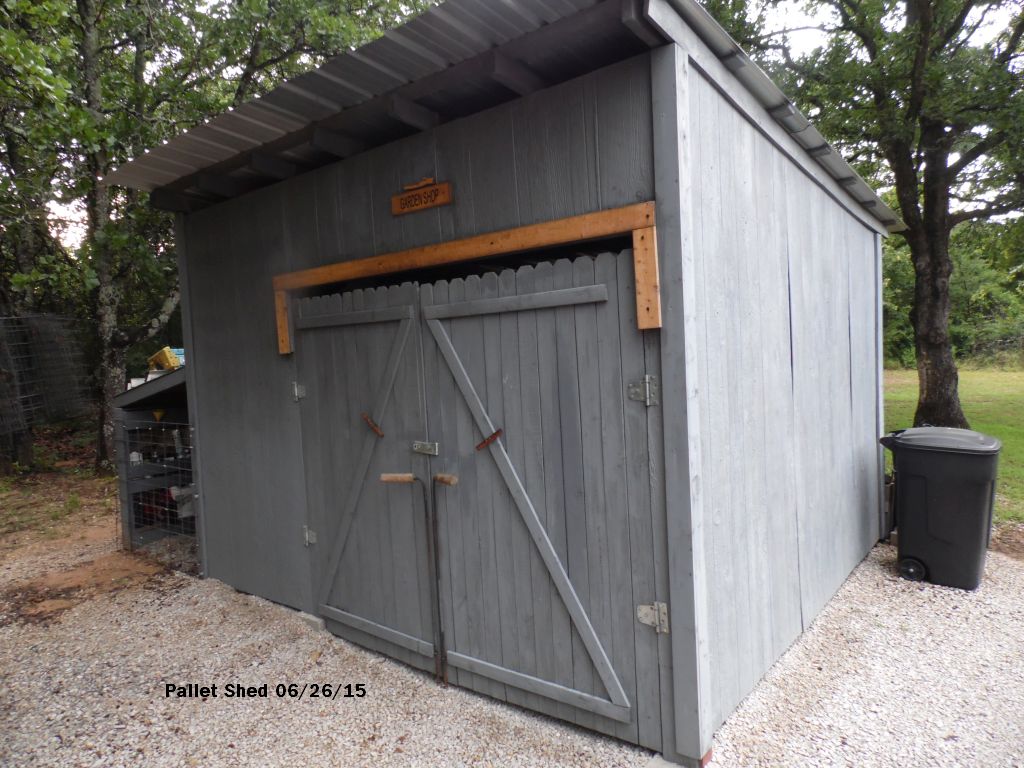
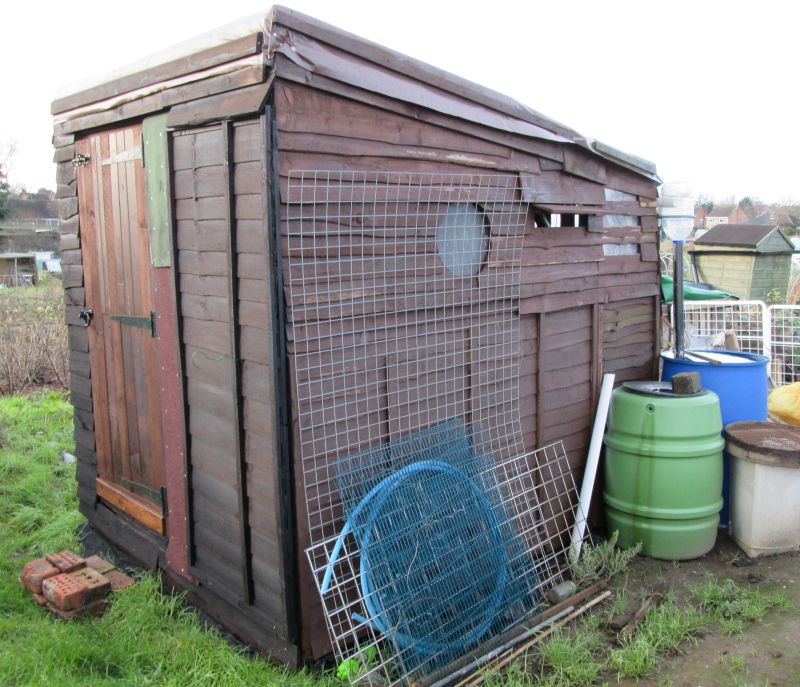
06/26/15 Current photo of my pallet shed. It’s just as strong as the day I built it in 2009. Photo01/12/16 In March 2009 I built a storage shed from recycled wood pallets. It turned out to be one of my best “home grown” projects. What I didn’t expect was when I made a webpage on my website about my pallet shed experience, it would get more Hits from around the world than nearly any other webpage. A few weeks ago I received an email from England asking about my pallet shed and how I built it. This week I received the following email from England along with a picture of Keith’s pallet shed.“Hi Butch, We’ve had a heap of rainy weather over the festive season, over here, so I only just got working on my allotment these last couple of days, and taking pictures of the shed. Nice of you to maybe put a picture up on your website, so I’m attaching a selection of photos showing different sides of the shed, just pick the one you figure that will fit best. That shot showing it part-built is when I built it first time, in the yard. When it was done we de-assembled it and took over to our allotment plot, and rebuilt it there. It’s only a pretty small shed, but it’s a whole lot bigger than the one the last guy left on our plot – that one was not tall enough to stand up in, and if it rained you had to hunker down inside on a seat with your knees touching the door! It was just really a tool store, I guess, so we needed something a bit bigger. This one I built is good and dry – so far! – and just before Christmas we got caught there in a bad rainstorm, but it was real dry and snug inside that shed. Again many thanks for your website and the help it gave in getting me putting that shed together. All the Best for the year ahead.” -Keith in the UKPhoto #1 Photo #201/18/16 “Butch, in your other email you mention about the roofline, and wrapping the roof material on and getting it fixed. So below is a little diagram which is attached (PDF file), showing how we did ours. Like you say, it was a bit of trouble figuring it out, as I’d not done one before. (I am one of those guys who like to make a sketch or a drawing on paper to help me figure out how I’m going to do something, so I had to have a couple of attempts before I felt I’d gotten it right enough to be waterproof). So far as the stuff on the outside goes, that is weatherboard taken from old fence sections which had been discarded. We call it larch lap fencing over here, although it’s not all larch wood nowadays. We know a guy who puts up new garden fences for folks around here, and he is happy that we take away old stuff from his trash pile. Some of it is quite good stuff, full 6′ x 6′ sections, but most has to be broken up to get the better lengths of weatherboarding out. It generally rots off at the bottom first, as you’d expect.” -Keith in the UKRoof Diagram01/16/16
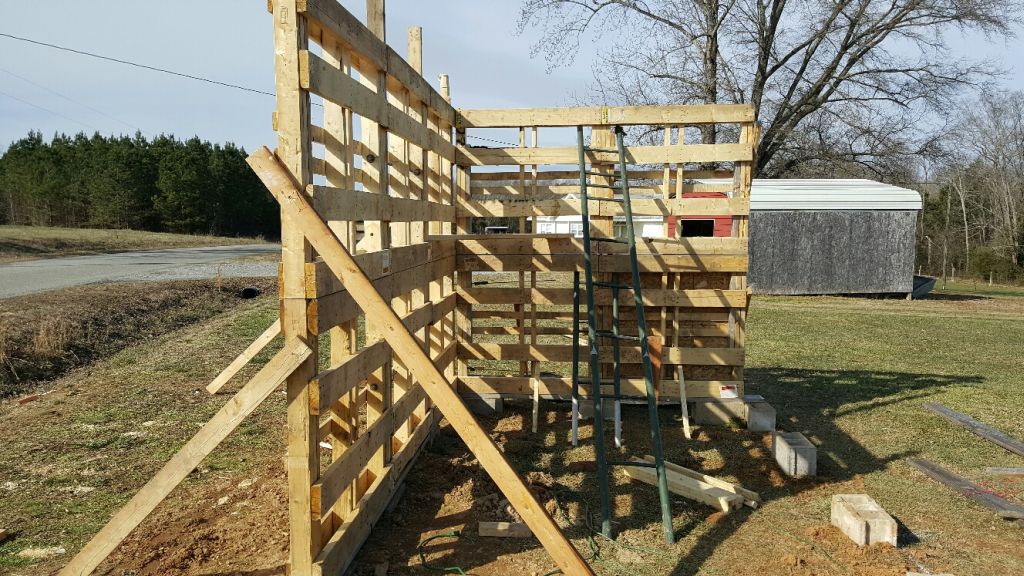
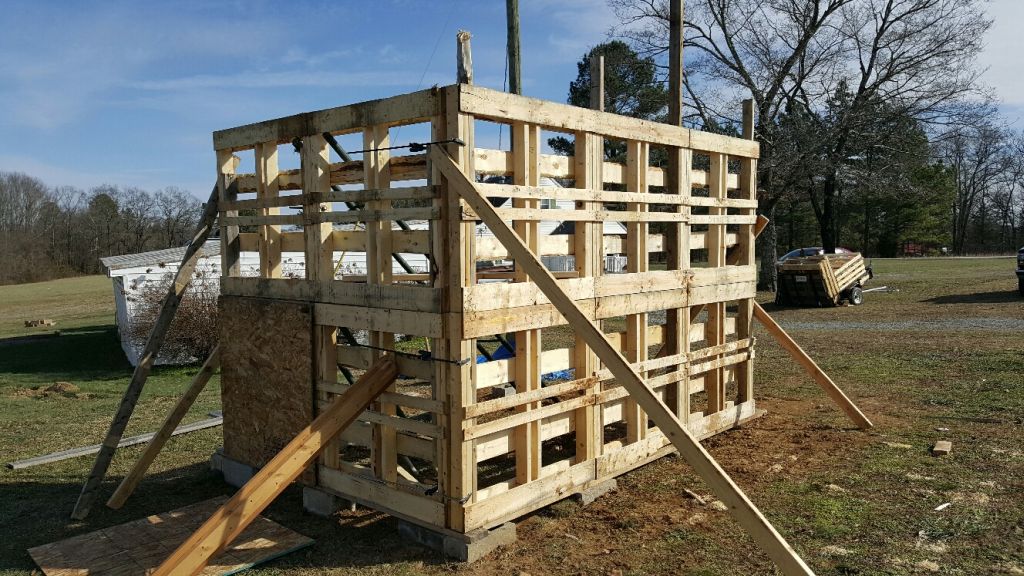
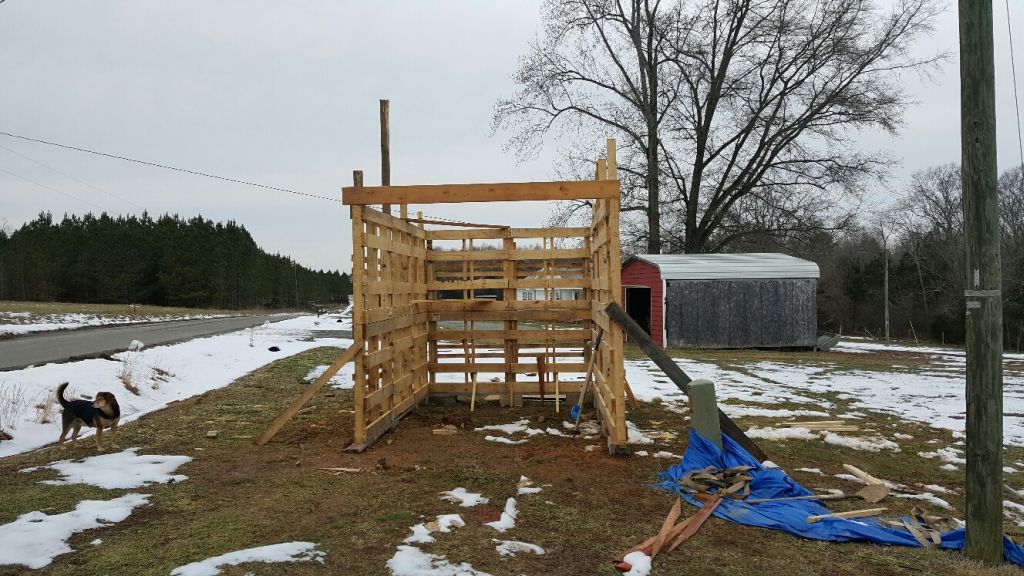
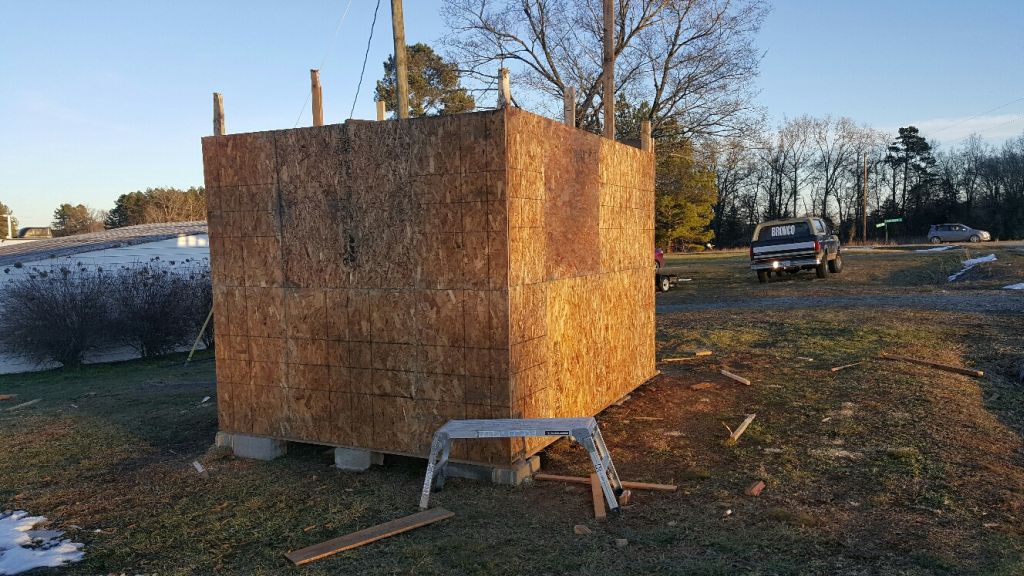
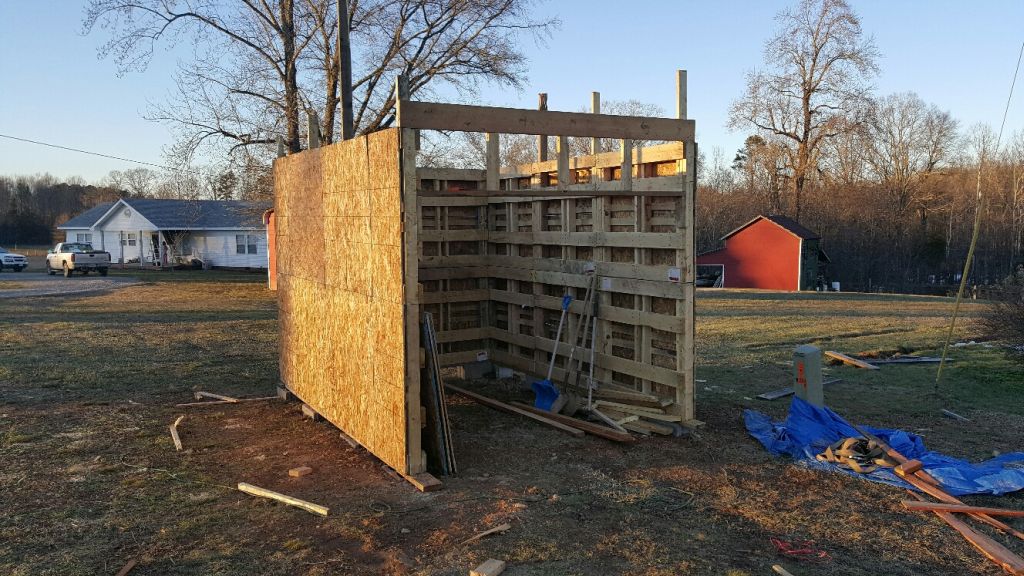
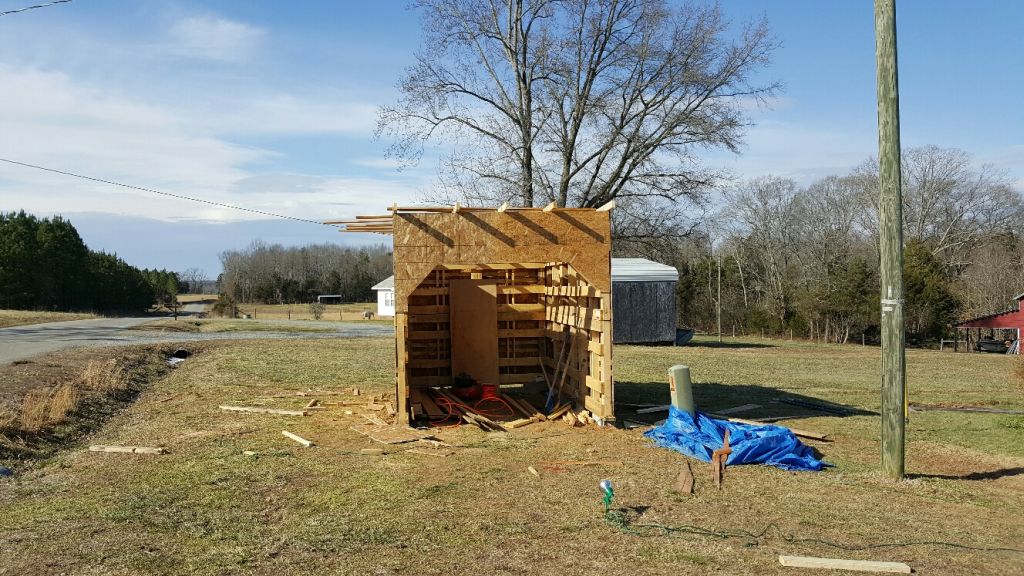
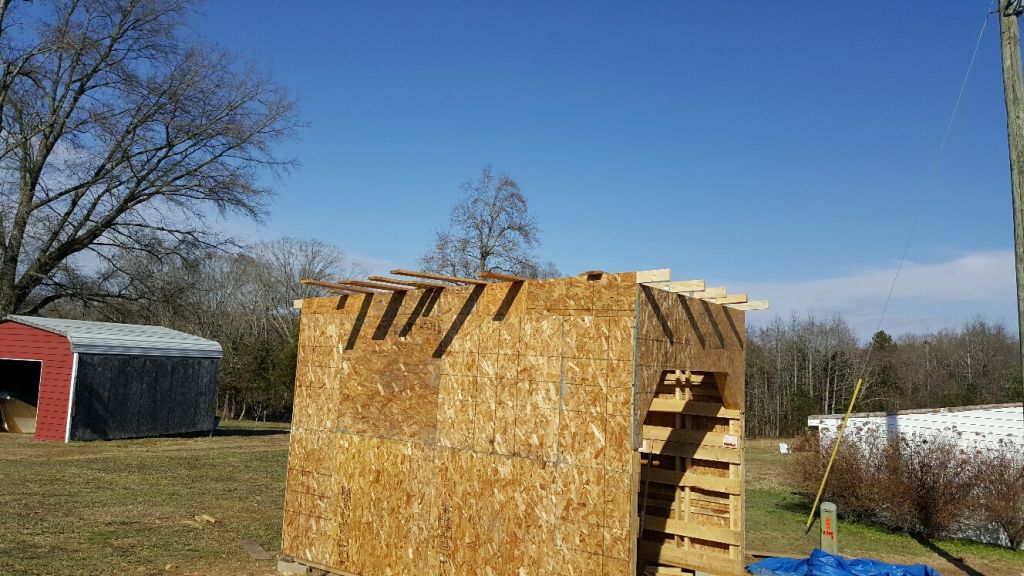
“Just wanted to send you a photo of the shed I built using your plans. My pallets weren’t square so my shed ended up 8′ x 10′ and over 9 ‘ tall. But I had a blast building it and your plans were awesome and real easy to follow. If I were going to do it over I would make the pitch steeper because of the snow here in New Jersey. But I’m happy with it. Thanks for the inspiration! I’m gonna do the chicken coop in the spring. Cheers.” -Alan Smith in NJ
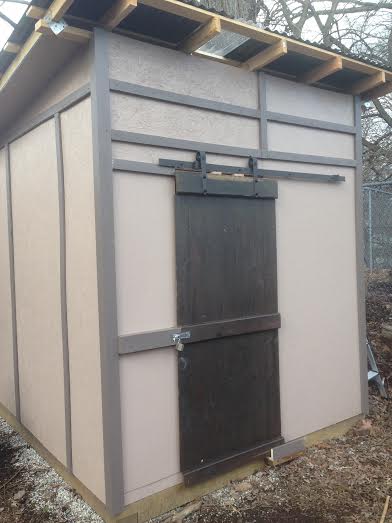
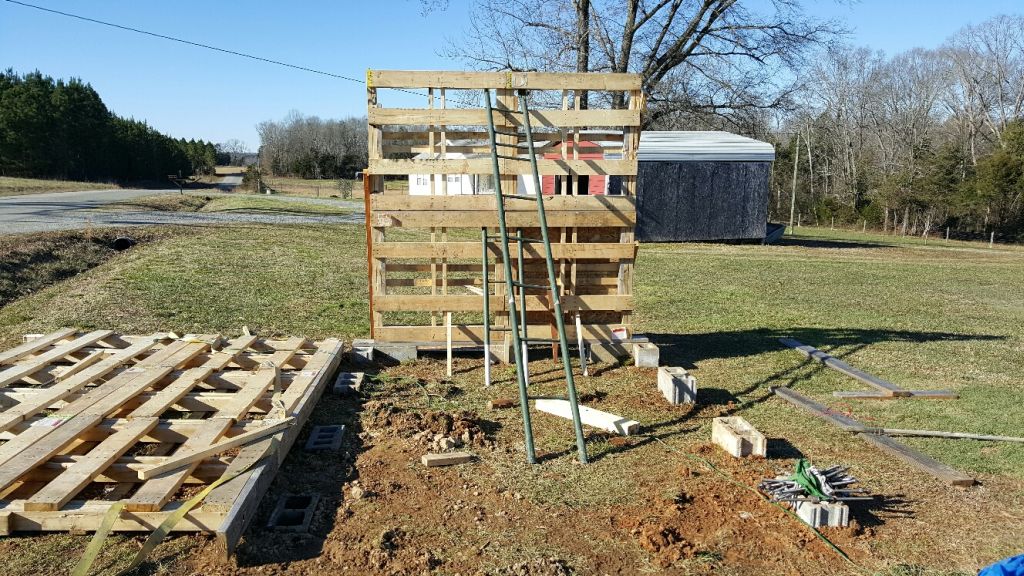
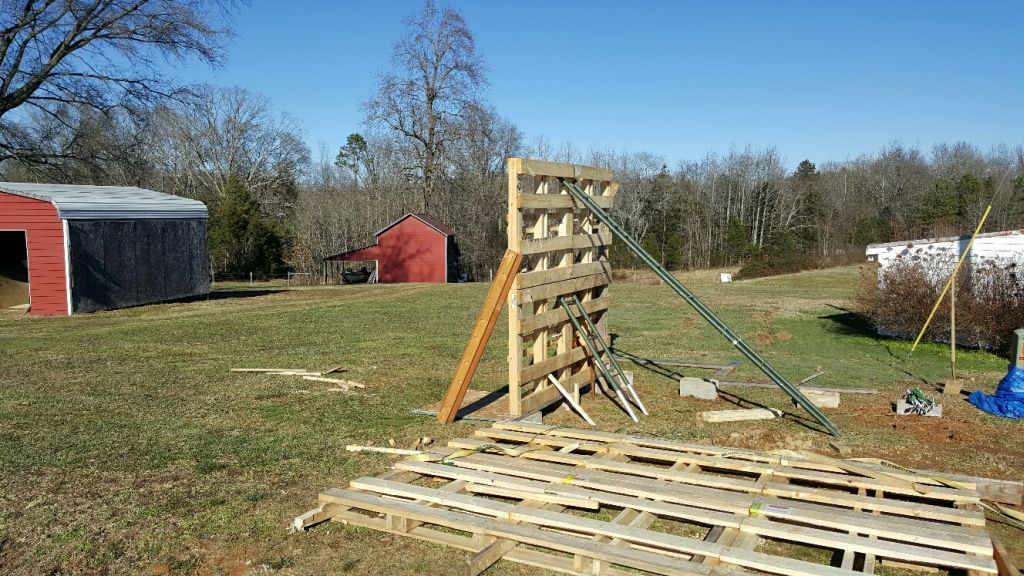
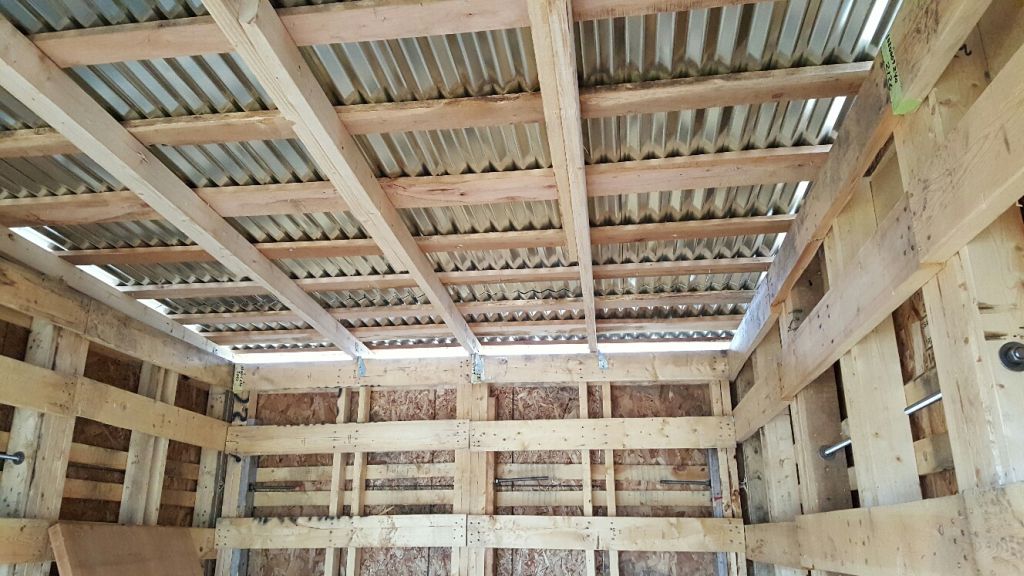
02/06/16 “I just want to thank you for your page about building a pallet shed. I decided I’d give it a shot since I too need some extra storage. I sourced my pallets from my work place. I got lucky, because all the pallets I got are 4ftx4ft, made out of 2x material and topped with 1/2″osb. I used 3/4″ all thread to bolt each pallet together. And ran 2×4 up at each seam to connect the top and bottom row. I pulled off the OSB to make the wall lighter to lift since I built it laying down. once it was all bolted and standing, my roof pitch was very slight (like I wanted). 8 inches of drop over 12 ft. The roofing tin (corrugated steel) is the only thing I have bought so far. That brought my grand total to $105. I’ll send you more pictures once it’s painted, but below is what I got. Thanks again for your inspiration!!” -Dustin in VirginiaPhoto 1 Photo 2 Photo 3 Photo 4 Photo 5 Photo 6 Photo 7 Photo 8 Photo 9 Photo 10 Photo 11Photo 12 Photo 13 Photo 14 Photo 15 Photo 1604/21/16 “Hi there, Butch! I just wanted to pass my thanks along to you. Your website about the pallet shed was an inspiration to me. My friend John and I cleared some land in my back yard this past weekend (we celebrate Patriots Day here in New England, so we even had a long weekend), and in just a few days, we conquered the task of building this garden shed! We used your basic design, along with some of the suggestions you posted on the web page. Using uniform 48″x51” oak pallets, we ended up with a shed 12′ long x 8′ deep x 10′ high. It’s a bit taller than I expected, but the higher pitch should help to shed snow in our harsh winters. I’m so glad you took the time to put your website together. It really gave me the confidence to dive in and try this project. This will be great for keeping my lawn / garden equipment tidy and out of the weather. I’m also thinking about adding on to the small out-building on the right side, so the kids can store all their bicycles. I was able to snap some photos during the construction process, and I posted them to a website. The link below goes to “PhotoBucket.com”. Thanks again!” -Steve
http://tinyurl.com/StevesPalletShed
By the way, my Pallet Webpage is the most viewed webpage on my website.
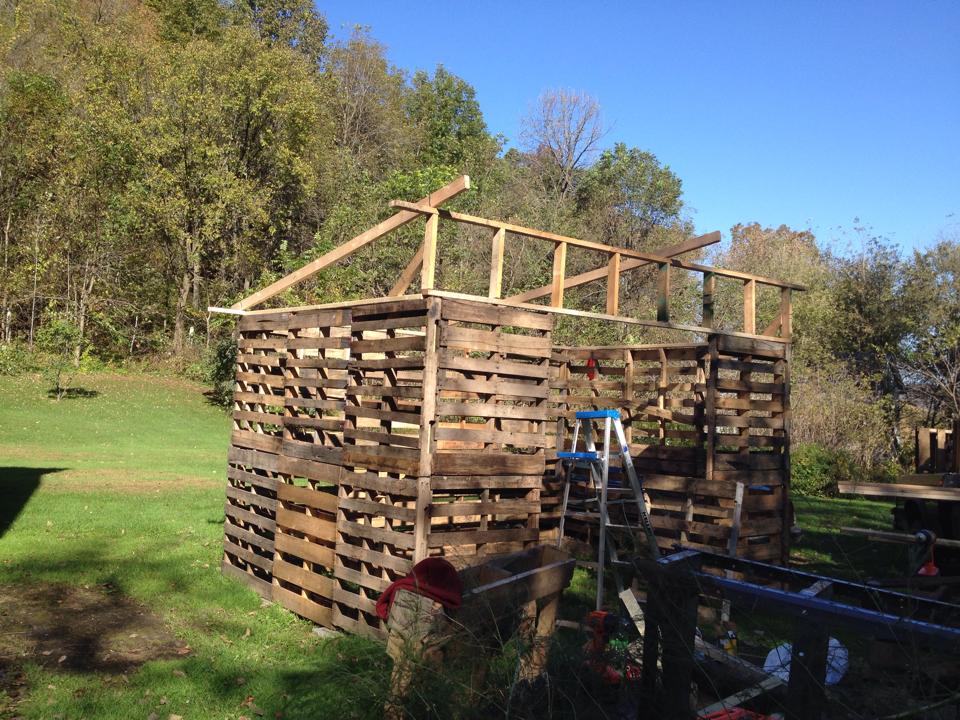
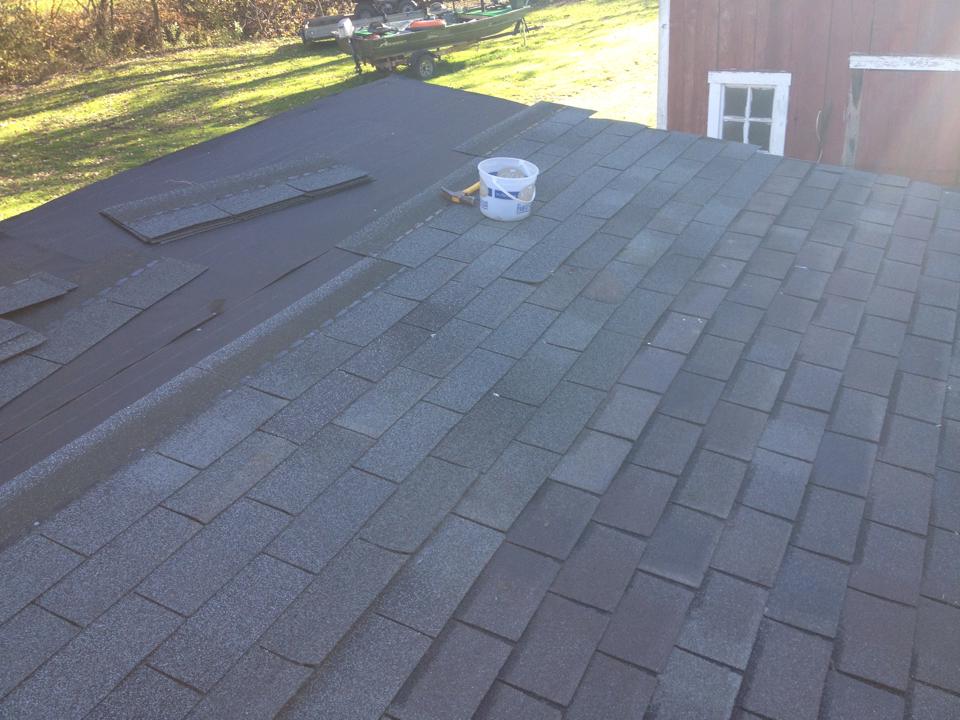
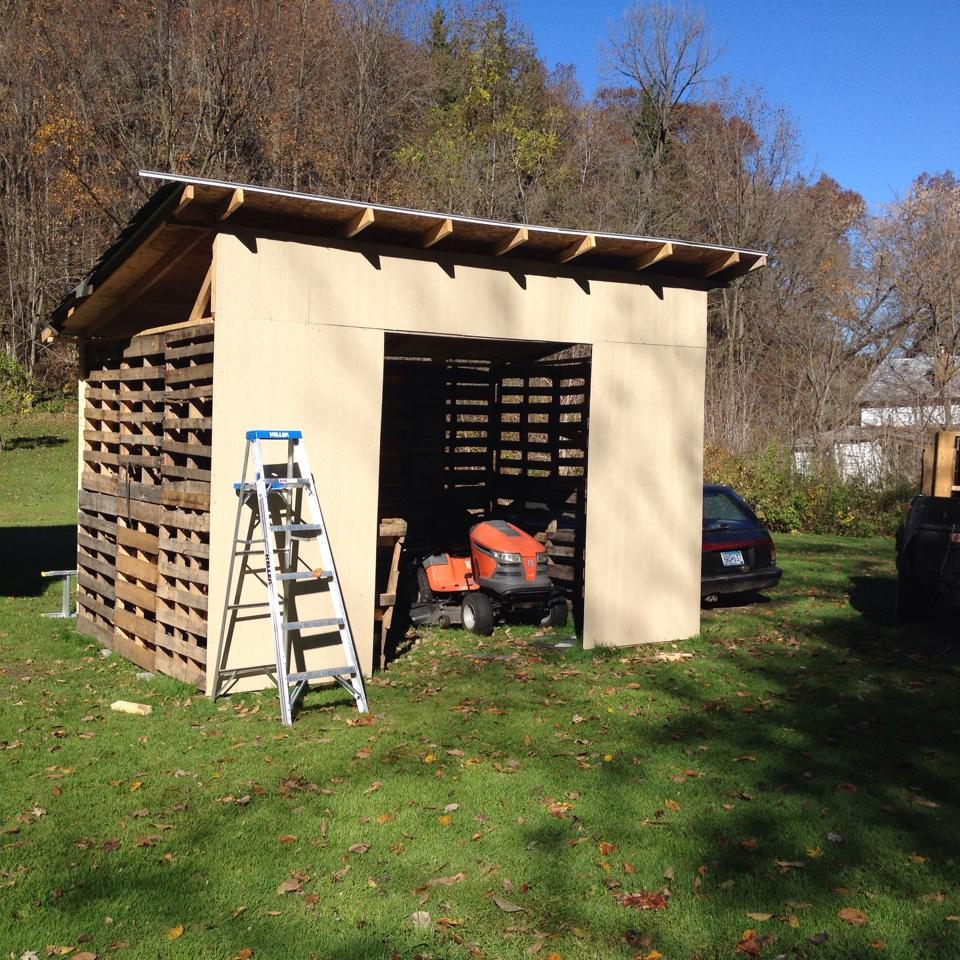
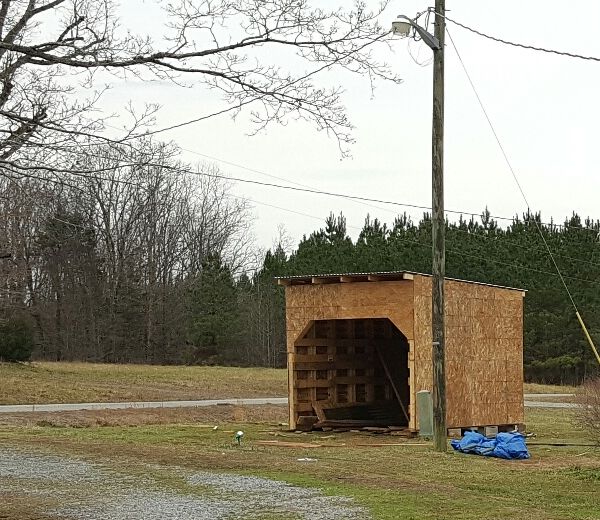
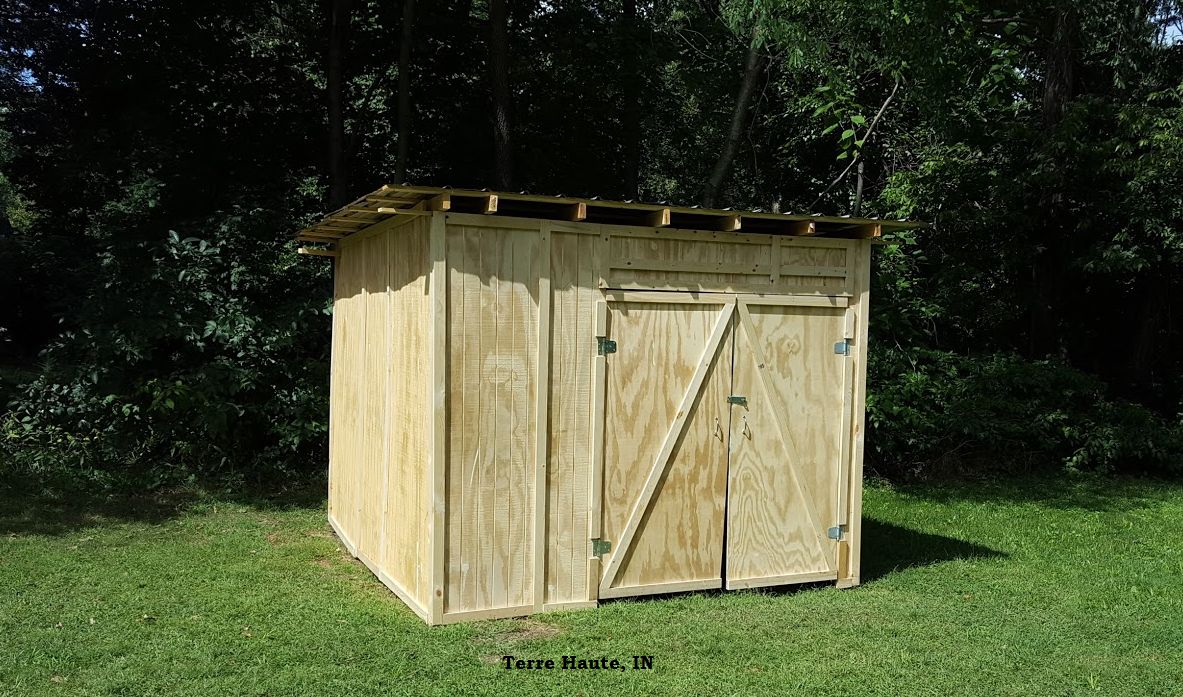
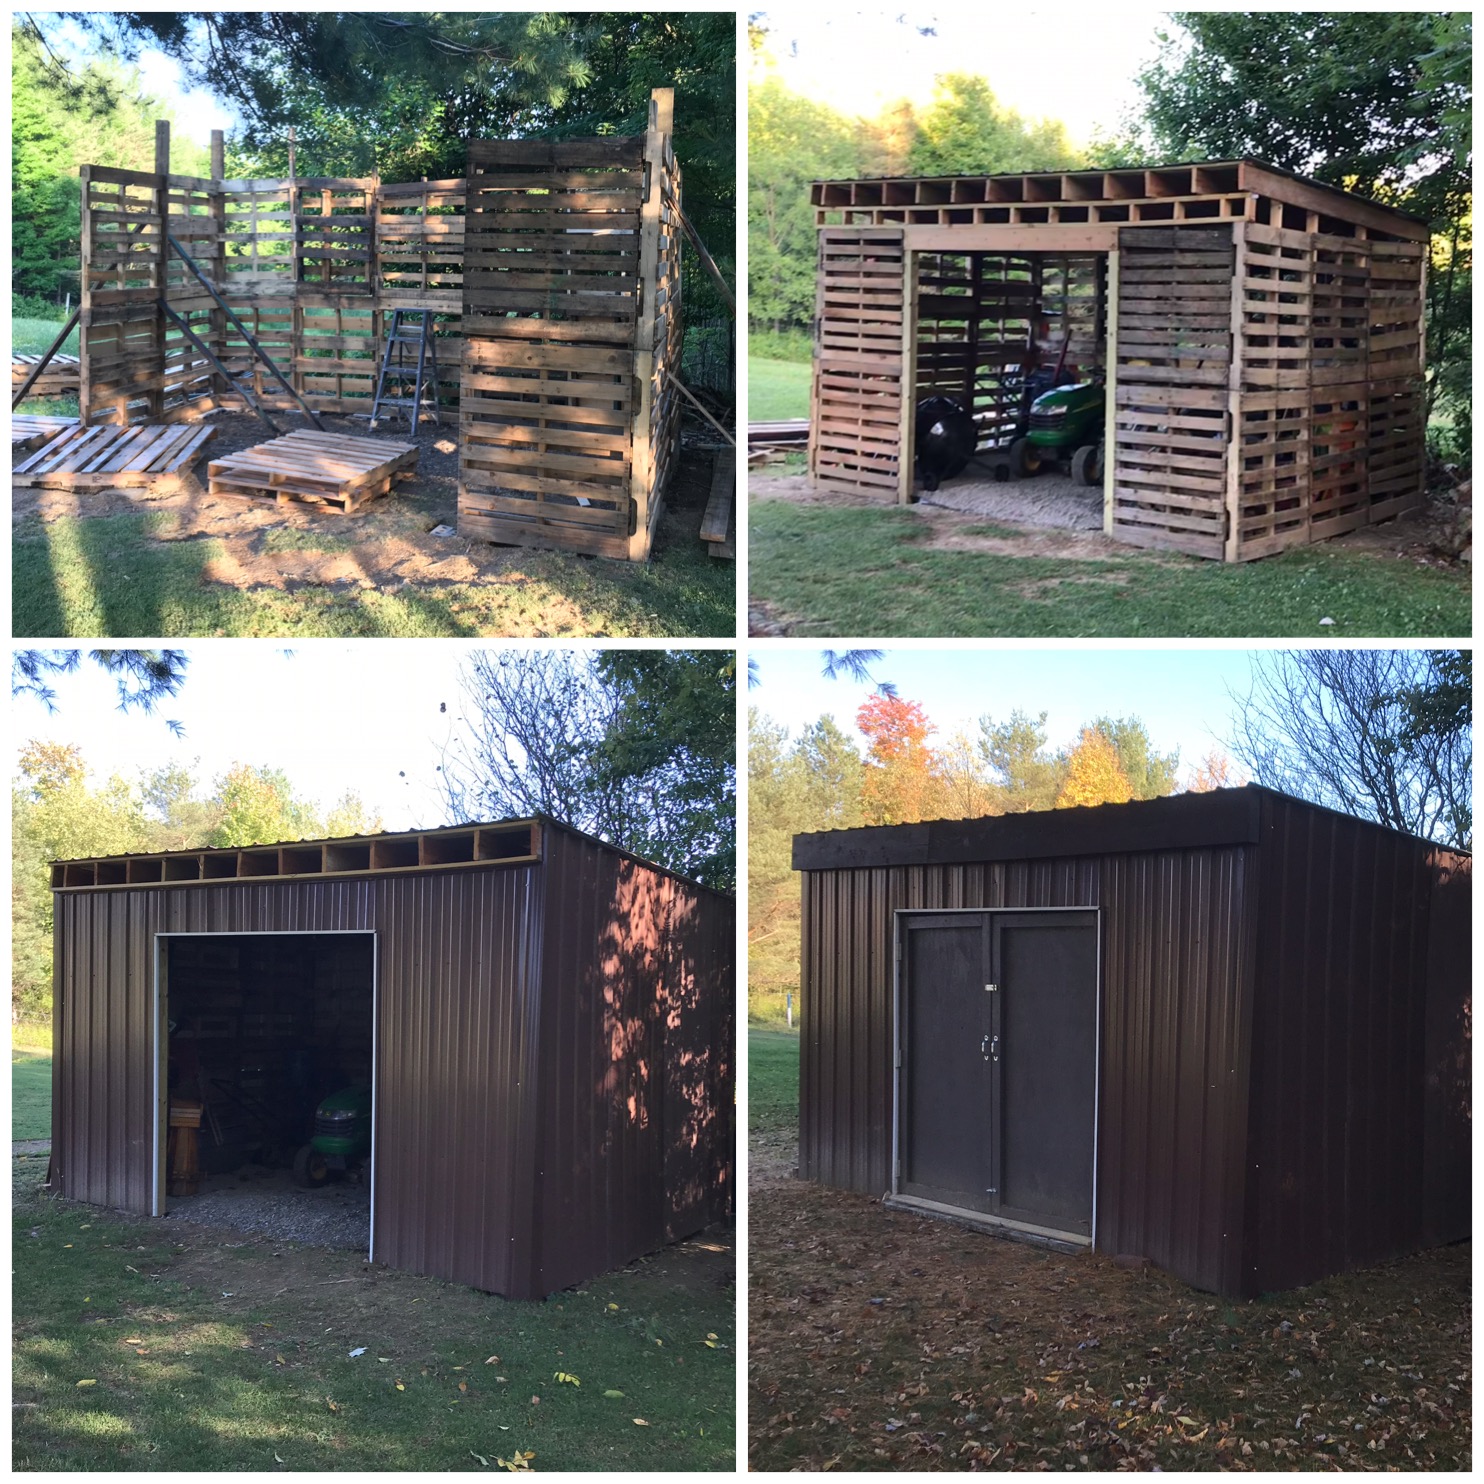
“Dear Butch, I found your website and was instantly inspired. My project turned out to be a little more complicated, as my pallets were not square. I certainly appreciate you sharing your experience and your advice. I think it saved me quite a bit of hassle when it came to figuring out a few things. Aside from the gravel to fill it, I finished the structure this weekend. We left some overhang and 1×4 out so we could attach lattice next spring and grow vegetables. Here are some photos. Best of luck.” -Christian in Terre Haute, IN Photo10/15/18 Butch, I wanted to write you and thank you for your pallet shed webpage and plan, it gave me inspiration to build a much needed shed. I live in Western New York & had to make some modifications to withstand heavy snow loads, but for the most part I went with the basics you outlined in your plan. It took most of the summer I since I’m a father of 3 young girls and it’s hard to find stretches of several hours to work, but I made it happen. My father in law is in construction so he was able to help me with what lumber & metal siding I needed. I think all in I probably put $200 into this 16×10 shed! This winter will be the test once the white stuff starts flying. Thanks again & wish you the best. -Mike in Western NY Photo